Documentation v1.0
Framer Ecommerce Template
The only Framer E-commerce template to support physical products, powered by Gumroad. It includes similar functionally that of a Shopify template.
Features:
Optional sizing variants (S, M, L, XL)
Cart functionality
Product reviews (powered by the CMS, and Tally.so)
Add 1-5 star reviews to your product pages
Feature rich product cards
Original price strikethroughs
Automatic sale badge on sale items
Image carousel on hover
Discount/sign up modal
Membership area (FREE - powered by MemberSpace)
Add membership exclusive content, discount codes, etc
Newsletter/email sign up (FREE - powered by Mailchimp)
Instagram feed widget (FREE - powered by Elfsight)
Homepage Testimonials (powered by the CMS)
Fully responsive
Lifetime free updates
Roadmap:
Multiple variants (e.g. colors)
Product search
Discount system (powered by CMS)
Categories (powered by CMS)
Blog (powered by CMS)
Creating Products
A. Create in Gumroad
Sign up for a free account at https://gumroad.com
Create your first physical product from Products in the left sidebar (This template also support digital products).
Add a description.
Upload your images.
Size Variants
This template supports size variants (S, M, L, XL). To add these scroll down to Versions while editing your product. Click Add Variant, name your variant Size. Continue by adding your sizes (This template only support the 4 mains size).
You must name your size variants the following for it to work: Small, Medium, Large, Extra-Large.

Add in the shipping details if creating a physical product.
Shipping will have to be handled manually by the shop owner.
Under the Content tab replace the text with your own custom copy. We recommend something like "Thank you for your order! You should receive your product within 5-7 business days."
Save & publish your product.
We'll refer back to this product for links in the next step.
B. Replicate in Framer
Go to your CMS
Here you can start deleting the default products that are included in this template.
Click New Item at the top.
Choose your category
This template comes with 3 categories predefined; Men, Women, Accessories. Refer to the Creating Categories section to update these.
Choose whether to feature this product. Featured products show up on the homepage.
Note: There's a limit of 4 products that will show.
Add all the information you added when created your product in Gumroad.
You have the choice to add a Compare At Price, this is for creating a sale on an item. If this amount is larger than the Price amount it'll show the original amount on the product card/page with a strikethrough and there will be a SALE badge that appears.
Size Variants
You have the choice of having size variants on. To turn off size variants simply toggle off the Show Size Variants toggle (This will trump the individual size variants toggles).
Go back to your product in Gumroad and copy its product link. You can do this by going into the edit screen of your product and clicking the link icon in the top right.

Go back to Framer and paste this URL into the Gumroad Product URL field.

You're done! If you won't be using variants, simply toggle off the Show Size Variants toggle.
Product Reviews
Your site includes product reviews powered by a CMS. Reviews can be submitted by buyers on each product page. It'll be your responsibility to add the reviews to the site/CMS.
A. Adding a review
To add a new review to your CMS, simply go to the CMS area in Framer, and click on Product Review's in the left sidebar.
Click on New Item at the top.
Fill in the review details. Make sure to add the slug of the product the review is for
e.g. power-cropped-zipped-hoodie
You're done!
B. Configure the 'Leave a Review' form
User's can leave a review when on a product page by clicking the Leave a Review link. A modal/form will then pop up allow the user to rate the product. The form is powered by https://tally.so. If you'd like it so user can't leave a review, simply delete the Leave a Review link from the Product Pages page in Framer.
To configure the review form, follow the following steps:
Go to https://tally.so and create an account.
Go here https://tally.so/templates/leave-a-review-form-template/3EqdL3 and click the Use this template button.
Click on the Publish button at the top.
Copy the Share Link.
Go to Framer, under Pages click on CMS > Product Pages in the left sidebar

Click on the Overlay layer in the left sidebar layer panel. It'll be under the Write a review layer. This will open up the overlay view showing the review modal & form.
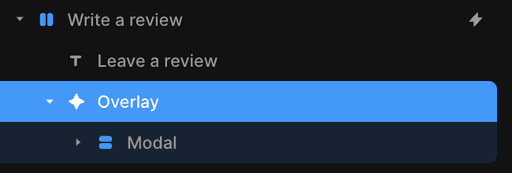
Click on the Review form component.
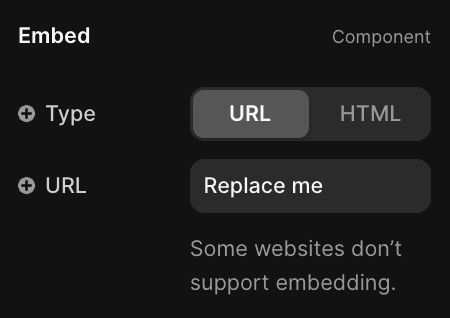
In the right sidebar paste your form link under Embed > URL
You're done! Any submitted reviews can be seen in your Tally.so dashboard. When reviews are submitted refer back to section A. for adding the review to your site.
Creating Categories
A. Edit CMS field
Go to your CMS.
Click Edit Fields
Click Category on the left.
Here you can add, delete, update your category names.
If adding a category, make sure you follow the next step
B. Create category page
Go to your Pages.
Right click on one of your already existing category pages (e.g. /products/men).
Click Duplicate.
Replace the category name with the one you just created in your CMS.
Go into your new page.
Click on the layer named Collection List.
In the right sidebar, under CMS Content > Filters click on Category.
Change the filter value to your new category you created earlier.
Congrats, any new product you now assign to this new category will show on this page.
Instagram feed
The Instagram feed is powered by https://elfsight.com. They have a free plan you can use.
Sign up for a ElfSight account at https://elfsight.com
Click on the Create Widget button.
Click on Instagram Feed.
Click Continue with this template.
Add your instagram handle to the Instagram Sources field, then click Add.

Click Publish on the top right.
Select the plan you wish (You can go with the Lite plan)
Click on the Share Link tab
Copy the link
Go back to Framer, click on the Instagram feed widget on the homepage.
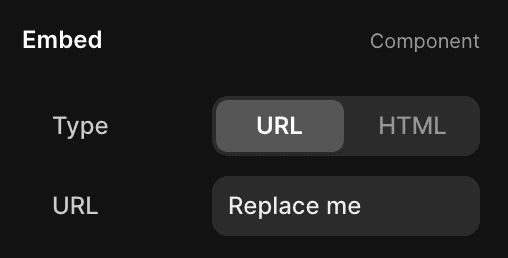
In the right sidebar replace the Embed > URL with the link you just copied.
You're done! Feel free to play around with the style of your widget in Elfsight.
Mailchimp sign up
Your site includes 2 sign up fields (For marketing purposes), one on the homepage near the bottom, and one in the sign up modal when the user clicks the floating circle (bottom right on the homepage).
To configure the sign up to your own mailchimp account simply do the following;
Follow these steps from Framer to get your unique Mailchimp URL: https://www.framer.com/plugins/mailchimp
When you have your URL copied, go back to your Framer site, and click on the Assets tab in the top left of the sidebar

Click on the Mailchimp Sign up component

Click on the Mailchimp Sign up component.
In the right sidebar, replace the Mailchimp > URL with your unique URL you had copied.
You're done!
Homepage Testimonials
Testimonials are crucial for building trust and credibility for your brand. They provide social proof, validating the quality and value of your products or services.
The homepage testimonials are powered by the CMS. You can edit/add new testimonials in by going to the Product Reviews CMS in Framer.
To add a new review:
Go in to the Product Reviews CMS
Click New Item.
Enter the review/testimonial details.
For the Product Slug enter: homepage
Membership login
Membership allows your users access to a locked page: /account. Here you can add anything you wish for your users, like discount codes, upcoming news, etc.
Membership is powered by https://www.memberspace.com They have a free plan you can use.
Sign up for a MemberSpace account at https://www.memberspace.com
Click the Join plan now button.
Click the Get Started button.
Log back in.
Click the Connect a new site button.
Fill our the details, then continue.
Choose the free plan.
Fill in the details, then click Next.
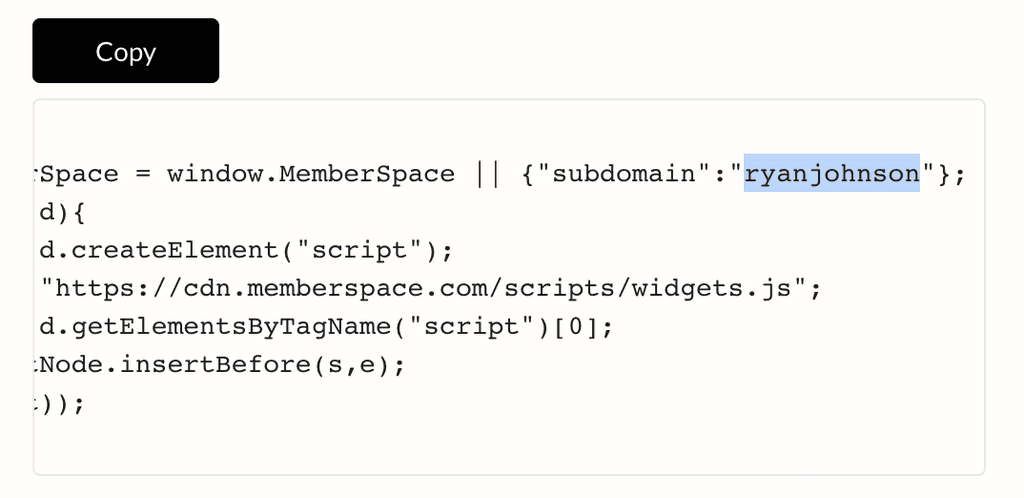
Next, copy the subdomain text in the code shown on screen
Go back to Framer.
Click on the settings icon in the top right.
Click on Site Settings > General in the left sidebar.
Scroll down to Custom Code > Start of <head> tag.
Find the similar looking code, and replace framer2 with the subdomain you copied earlier.

Click the Verify Install button.
A. Configure Member page (MemberSpace)
This is assigns the page in which is locked without logged in. We want to target the /account/ page
Click Member Pages in the header.
If there isn't already a page, create one.
For the Enter your page URL field enter /account/
Check your plan under Which Member Plans can have access?
If there isn't one yet, it just means you need to create the plan first. This will be done in the next section.
B. Configure Member plan (MemberSpace)
This is the plan your users get access to when signed up. MemberSpace allows subscription based plans, but we'll be sticking to the free one.
Click Member Plans in the header.
If there isn't already a plan, create one.
Check your plan under Which Member Page(s) can be accessed?
For the After Sign Up - send members here field, enter your website with /account appended.
For the After Log In - send members here field, enter your website with /account appended.

Toggle Enable Plan? to on.
Save and exit.
C. Extra settings (MemberSpace)
Click Customize in the header.
Click General Options.
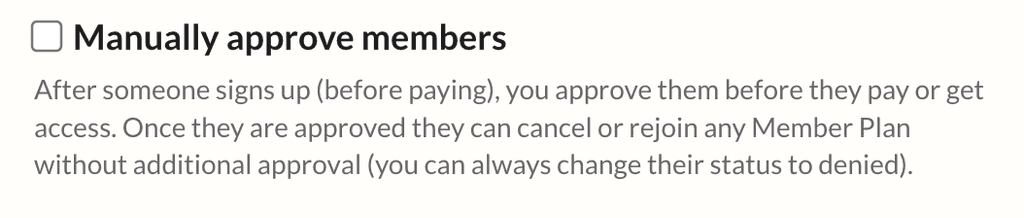
Uncheck Manually approve members
Check Enable Create Account button within Login form

Feel free to play around with any other options here.
Click Save Changes.
C. Update 'Become a member' link in header (Framer)
Once verified go to https://admin.memberspace.com/sites
Click on your site.
Click the Customize link in the header.
Click Integrations.
Click Custom HTML Website.
Scroll down to the Popup section.
Click the Copy button
Next, go to Framer, click on the Assets tab on the top left.
Click on the Header component.
Click on the Become a member link
Replace the Link > Link To with the link you just copied.

You're done.